
A 4-way switch wiring diagram is a visual guide showing how to connect switches to control lighting from multiple points. It ensures safety, efficiency, and proper connections, making it essential for DIYers and electricians. Understanding these diagrams helps manage complex wiring setups, especially in larger spaces.
1.1 What is a 4-Way Switch?
A 4-way switch is an electrical device used to control lighting or appliances from multiple locations. Unlike a standard toggle switch, it features four terminals, allowing it to connect with two or more 3-way switches in a circuit. This setup enables control of a single light or fan from three or more different points, such as staircases or large rooms. The switch operates by directing the electrical current through traveler wires, ensuring the circuit remains connected regardless of the switch positions. It is a key component in complex wiring configurations, providing flexibility and convenience in managing lighting systems.
1.2 Purpose of a 4-Way Switch
The primary purpose of a 4-way switch is to enable control of a light or appliance from three or more locations. It acts as an intermediary in a circuit with multiple 3-way switches, ensuring the electrical current can flow through the correct paths. This setup is ideal for areas requiring flexible lighting control, such as staircases or large rooms. By providing additional control points, it enhances convenience and functionality, making it easier to manage lighting from various spots without compromising safety or efficiency.
1.3 Importance of Wiring Diagrams
Wiring diagrams are essential for safely and correctly installing electrical systems. They provide a clear, visual representation of connections, ensuring components function as intended. These diagrams help prevent short circuits, electrical fires, and other hazards. By following a wiring diagram, DIYers and professionals can avoid costly mistakes and ensure compliance with electrical codes. They also serve as a troubleshooting guide for identifying and resolving issues. A 4-way switch wiring diagram simplifies complex setups, making it easier to manage multiple control points for lighting or appliances. Accurate diagrams ensure reliability, efficiency, and long-term safety in any electrical project.

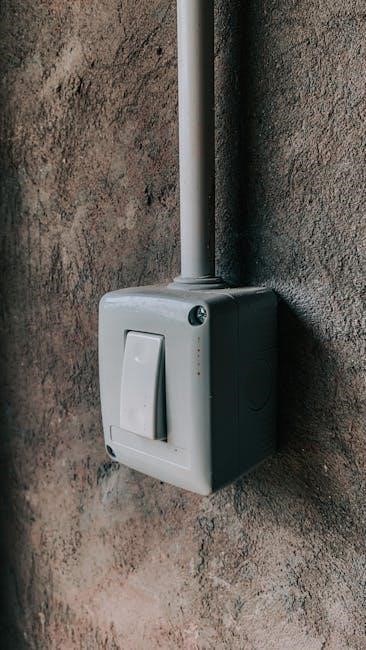
Components of a 4-Way Switch
A 4-way switch includes terminals for common, traveler, and neutral wires, enabling control of lighting from multiple locations with precise connections ensuring safe and efficient operation;
2.1 Understanding the Structure
A 4-way switch features a compact design with multiple terminals to handle various wire connections. It typically includes common terminals and traveler terminals, which are essential for controlling lighting from multiple points. The structure allows for the distribution of electrical signals between switches, ensuring smooth operation. Neutral wires are also connected to maintain circuit integrity. Understanding the layout is crucial for proper installation, as misconnections can lead to malfunctions. The switch’s design ensures flexibility in wiring configurations, making it adaptable for different electrical setups. Familiarizing yourself with its components is the first step toward successful installation and troubleshooting.
2.2 Terminals and Connections
A 4-way switch typically has four terminals, including common and traveler terminals, which facilitate connections between multiple switches. The common terminals are used to link the power source, while traveler terminals carry the electrical signal between switches. Proper wiring requires connecting hot (black), neutral (white), and ground (green) wires to the correct terminals. Ensuring secure connections is critical to avoid electrical hazards. Using copper conductors and tightening terminal screws properly are essential for reliability. Misconnections can lead to circuit malfunctions, so following a wiring diagram is crucial for accurate installation and safety.
2.3 Differences from 3-Way Switches
A 4-way switch differs from a 3-way switch by having four terminals instead of three, enabling control from three or more locations. Unlike 3-way switches, which connect two control points, 4-way switches allow for intermediate control in multi-switch circuits. They are typically installed between two 3-way switches, providing added flexibility in lighting control. This makes 4-way switches ideal for larger spaces requiring multiple control points, such as staircases or hallways. Their wiring is more complex, involving traveler wires between switches, but they offer greater versatility in managing lighting systems.

Wiring Diagrams for 4-Way Switches
4-way switch wiring diagrams provide clear visual representations for installing and troubleshooting multi-location lighting control. They include detailed connections for travelers, commons, and neutrals, ensuring proper setup and functionality.
3.1 General Overview
A 4-way switch wiring diagram offers a visual breakdown of connections for controlling lights from multiple locations. It typically involves two 3-way switches and one 4-way switch, with travelers and common terminals. The diagrams detail how to connect wires for proper functionality, ensuring lights can be operated from different points. They also highlight safety measures like turning off power before wiring. These diagrams are essential for understanding complex setups and troubleshooting common issues. PDF versions provide clear, printable guides for easy reference during installation or repair, making them invaluable for both DIY enthusiasts and professionals.
3.2 Diagrams for Multiple Locations
4-way switch wiring diagrams are crucial for setups requiring control from multiple locations. These diagrams illustrate how to connect switches and wires to enable lighting control from three or more points. They typically involve two 3-way switches and one 4-way switch, with travelers and common terminals playing key roles. The diagrams show how to route wires between switches and the load, ensuring proper connectivity. PDF resources often include these configurations, providing clear visuals and step-by-step instructions. They are indispensable for understanding how to wire complex circuits efficiently and safely, making them a go-to resource for both professionals and DIY enthusiasts.
3.3 PDF Resources for Wiring Diagrams
PDF resources for 4-way switch wiring diagrams are widely available online, offering detailed visual guides and instructions. These files provide clear schematics for connecting switches, travelers, and loads. Many manufacturers, such as Leviton, offer free downloadable PDFs tailored to specific products. Additionally, websites and forums dedicated to electrical projects provide comprehensive diagrams for multiple configurations. These resources are invaluable for understanding complex wiring setups and ensuring compliance with safety standards. They often include step-by-step instructions, making them accessible to both professionals and DIY enthusiasts. Downloading these PDFs is a convenient way to reference wiring diagrams anytime, ensuring accurate installations.

Safety Precautions
Always disconnect power at the circuit breaker before wiring. Use copper conductors and avoid hazardous materials. Follow local electrical codes to prevent shocks, fires, or fatalities.
4.1 Disconnecting Power
Disconnecting power is the first and most critical safety step when working with a 4-way switch wiring diagram; Always switch off the power at the circuit breaker or fuse box. Verify the power is off using a voltage tester to ensure no electrical current is present. This prevents shocks, fires, or fatal accidents. Never rely on the light being off; always test for voltage. Turning off power ensures a safe environment for wiring and prevents damage to components. This step is essential for both installation and troubleshooting of 4-way switch configurations.
4.2 Using Proper Materials
Using proper materials is essential for safe and reliable 4-way switch wiring. Always use copper conductors, as they are highly conductive and durable. Avoid aluminum wires due to their higher resistance and fire risks. Ensure wires are of the correct gauge (10AWG to 12AWG) to handle the circuit’s current. Use insulated wires to prevent short circuits and ensure connections are secure. Proper materials guarantee safety, efficiency, and compliance with electrical codes. Incorrect materials can lead to hazards or system malfunctions, making this step critical for any 4-way switch installation.
4.3 Avoiding Common Hazards
Avoiding common hazards ensures a safe and successful 4-way switch installation. Always disconnect power at the circuit breaker and verify voltage absence with a tester. Never touch live wires, as this can cause electric shock or death. Prevent short circuits by ensuring wires are properly insulated and securely connected. Avoid overloading circuits, which can lead to fires. Keep materials away from flammable sources and use only copper conductors for reliability. Follow local electrical codes and manufacturer guidelines to minimize risks. Proper precautions protect people, property, and ensure the system functions correctly.

Tools Required
Essential tools include wire strippers, pliers, voltage testers, screwdrivers, and lineman’s pliers. These ensure safe and precise connections when working with a 4-way switch wiring diagram.
5.1 Essential Tools
For 4-way switch wiring, essential tools include wire strippers, needle-nose pliers, screwdrivers, and voltage testers. Wire strippers remove insulation safely, while pliers assist in bending wires. Screwdrivers secure connections, and voltage testers ensure no power is present. Additional tools like lineman’s pliers and a multi-tool can help with wire management. Using copper conductors only is crucial for reliability. Proper tools ensure safe, efficient, and precise connections, reducing risks of electrical hazards. Always follow torque specifications for terminal screws to avoid loose connections. These tools are vital for completing the wiring process outlined in the 4-way switch wiring diagram.
5.2 Wire Strippers and Pliers
Wire strippers and pliers are indispensable for precise wiring. Strippers safely remove insulation without damaging conductors, while pliers bend wires for secure connections. For 4-way switches, use lineman’s pliers to grip and shape wires. Ensure insulation is stripped 1/2 inch for proper terminal connections. Pliers also help tighten screws securely, applying 14 pound-inches of torque. Using these tools ensures reliable connections and minimizes risks of electrical hazards. Properly stripping and shaping wires is critical for the wiring diagram to function correctly. Always use copper conductors for optimal performance and safety in your 4-way switch installation.
5.3 Voltage Testers
Voltage testers are essential tools for verifying the absence of electricity in wires before starting work. They ensure safety by detecting live circuits, preventing shocks or fires. Use a tester to confirm power is off at the circuit breaker or fuse. Testers also help identify hot wires and verify connections. For 4-way switch wiring, always test wires to avoid electrical hazards. Non-contact testers are ideal for quick checks, while digital testers provide precise voltage readings. Proper use of testers is crucial for safe and accurate wiring diagram implementation, ensuring your 4-way switch installation is secure and reliable.
Step-by-Step Installation Guide
Begin by planning your circuit based on the 4-way switch wiring diagram. Disconnect power, then connect wires between switches and lights, ensuring travelers and commons are linked. Test the circuit to confirm functionality and safety, using a non-contact tester to verify power is off before starting. Follow the diagram carefully to avoid errors and ensure all connections are secure for reliable operation.
6.1 Preparing the Circuit
Before installing a 4-way switch, ensure the circuit is prepared. Disconnect power at the breaker and verify it’s off using a voltage tester. Use copper conductors, as they are required for safe and reliable connections. Remove insulation from the wires as needed, typically 1/2 inch, to ensure proper termination. Check the wiring diagram to identify the control line, load, and neutral connections. Secure all wires to terminals using the recommended torque (14 pound-inch or 1.6 Nm). Properly labeling the wires according to their function will simplify the installation process and reduce the risk of errors.
6.2 Connecting Wires
When connecting wires for a 4-way switch, start by linking the traveler terminals between the switches. Use black and red wires for the travelers, ensuring they are securely attached to the appropriate terminals. The common terminal on each switch should be connected to the load or power source. Grounding wires must be properly connected to ensure safety. Follow the wiring diagram to match the correct wires to their terminals. Use a screwdriver to tighten the connections firmly, applying the recommended torque (14 pound-inch or 1.6 Nm) to prevent loose wires; Double-check all connections to avoid short circuits or malfunctions.
6.3 Testing the Circuit
After connecting the wires, turn the power back on at the circuit breaker. Use a voltage tester to ensure no live wires are present before testing. Flip each switch to verify the light or fan turns on and off from all control points. Check that the circuit operates smoothly without flickering or dimming. If the light doesn’t work, turn off the power and inspect connections for loose wires or incorrect terminal links. Ensure all switches function properly to confirm the wiring is correct. Testing confirms the circuit’s safety and functionality, ensuring reliable operation from multiple locations.

Understanding 4-Way Switch Functionality
A 4-way switch enables control of a light or fan from multiple locations by connecting two 3-way switches. It uses traveler wires to direct the electrical flow, ensuring seamless operation across all control points. This setup is ideal for larger spaces, providing flexibility and convenience in lighting management. Understanding its functionality is key to wiring it correctly and ensuring reliable performance from every switch location.
7.1 How 4-Way Switches Work
A 4-way switch operates by connecting two 3-way switches to control a light or fan from three locations. It uses traveler wires to direct the electrical current between switches. When toggled, the 4-way switch changes the connections between its terminals, allowing the circuit to be completed or broken. The common terminal ensures continuity, while the traveler terminals reroute power based on the switch’s position. This setup enables seamless control from multiple points, making it ideal for staircases or large rooms. Understanding this mechanism is crucial for proper wiring and functionality.
7.2 Role of Travelers and Common Terminals
In a 4-way switch, traveler terminals are responsible for rerouting power between switches, while the common terminal maintains circuit continuity. The travelers connect to the 3-way switches, allowing the current to flow through different paths. When the 4-way switch is toggled, it alternates the connections between its traveler terminals, ensuring the circuit is either completed or broken. The common terminal remains constant, providing a stable connection point. This configuration enables control of a single light or fan from multiple locations, making it a versatile solution for complex wiring setups. Proper identification of these terminals is key to successful installation and functionality.
7.3 Configurations for Multiple Control Points
Configurations for multiple control points involve using a combination of 3-way and 4-way switches. The 4-way switch acts as an intermediary, connecting two 3-way switches to control a single light or fan from three or more locations. This setup requires careful wiring, with traveler wires connecting the switches and a common wire linking the light. Proper wiring diagrams ensure that power flows correctly through the circuit, allowing seamless control from any location. This configuration is ideal for larger spaces, such as hallways or staircases, where multiple control points enhance convenience and functionality.

Troubleshooting Common Issues
Troubleshooting 4-way switch issues often involves identifying faulty connections or incorrect wiring. Common problems include lights not working or malfunctioning switches, which can stem from improper traveler or common wire connections. Referencing a wiring diagram helps pinpoint misconfigurations and ensures power flows correctly through the circuit. Regular checks and adherence to safety guidelines can prevent such issues, ensuring reliable control from multiple locations.
8.1 Identifying Faulty Connections
Identifying faulty connections in a 4-way switch setup requires careful inspection. Common issues include loose wires, incorrect traveler or common terminal connections, or misconfigured neutral links. Start by visually inspecting all terminals for secure connections and proper wire coloring. Use a voltage tester to detect live wires and ensure power is off before handling. Referencing a wiring diagram can help verify if connections match the intended configuration. Addressing these issues promptly prevents electrical hazards and ensures reliable control of lighting or devices from multiple locations. Always disconnect power at the circuit breaker before troubleshooting to maintain safety.
8.2 Resolving Power Issues
Resolving power issues in a 4-way switch system involves checking the power source and connections. Ensure the circuit breaker or fuse is not tripped or blown. Use a voltage tester to confirm power is present at the switch and load. Verify that all wires are securely connected and match the wiring diagram. Common issues include incorrect traveler or common terminal connections. If power is inconsistent, check for loose wires or damaged cables. Always disconnect power at the breaker before troubleshooting to avoid electrical shocks. Consulting a wiring diagram can help verify the correct configuration and resolve power-related problems effectively.
8.3 Fixing Switch Malfunctions
Malfunctions in 4-way switches often stem from faulty connections or incorrect wiring. Start by inspecting the switch terminals for looseness or corrosion. Use a voltage tester to verify power flow through travelers and common wires. If the switch fails to control the load, check the wiring against the wiring diagram to ensure proper connections. Replace any damaged or worn-out wires and tighten all terminals securely. If issues persist, consider replacing the switch itself. Always disconnect power before attempting repairs to ensure safety. Consulting the wiring diagram can help identify and resolve configuration errors effectively.

Advanced Configurations
Advanced setups involve integrating dimmer switches, smart home systems, and high-voltage applications. These configurations require precise wiring diagram interpretations to ensure compatibility and functionality across complex networks.
9.1 Integrating Dimmers
Integrating dimmer switches into a 4-way system requires precise wiring diagram interpretation. Dimmers must be connected in series with the load, ensuring compatibility with the 4-way setup. Use a dimmer-rated 4-way switch to maintain functionality. The wiring involves connecting the dimmer to the load while linking travelers between switches. Always follow the manufacturer’s guidelines for compatibility. Proper installation ensures smooth dimming and prevents issues like flickering. Refer to detailed PDF diagrams for step-by-step guidance. Safety is crucial; disconnect power before starting. This configuration enhances energy efficiency and ambiance control in multi-switch environments.
9.2 Combining with Smart Home Systems
Integrating 4-way switches with smart home systems enhances control and automation. Use compatible smart switches that support multi-location control. Follow specific wiring diagrams ensuring proper connections for Wi-Fi or Zigbee communication. Ensure compatibility with your smart home hub. Connect travelers and common terminals as per smart switch guidelines. Consult manufacturer instructions for detailed steps. Test connectivity post-installation. Troubleshoot issues like unresponsive switches by checking wiring and network connections. Utilize resources like PDF guides and video tutorials for successful integration, ensuring seamless smart lighting control from multiple points.
9.3 Wiring for High-Voltage Applications
For high-voltage applications, 4-way switches require specialized wiring to ensure safety and reliability. Use cables rated for higher voltages, such as 120VAC or 240VAC, depending on the load. Ensure all connections are secure to prevent arcing. Follow specific high-voltage wiring diagrams to avoid hazards. Use copper conductors only, as they provide better conductivity and durability. Consult manufacturer guidelines for torque specifications when tightening terminals. Always disconnect power before starting work and verify voltage absence with a tester. Proper insulation and grounding are critical to prevent shock or fire risks. Refer to advanced wiring resources for detailed high-voltage configurations and safety protocols.

Resources and Downloads
Access free PDF downloads of 4-way switch wiring diagrams for detailed visual guides. Utilize video tutorials and manufacturer guides to ensure accurate installation and troubleshooting.
10.1 Free PDF Downloads
Download free PDF files containing detailed 4-way switch wiring diagrams for various configurations. These resources provide clear visuals and step-by-step instructions for installations. Whether you’re controlling lights, fans, or integrating dimmers, these diagrams cover multiple scenarios. Many PDFs include troubleshooting tips and safety guidelines. Manufacturer-specific guides, like Leviton’s, offer precise instructions for their products. These downloads are ideal for DIYers and professionals, ensuring accurate and safe wiring. Simplify your project with these comprehensive guides, available at no cost. Download now and gain confidence in your electrical work.
10.2 Video Tutorials
To wire a 4-way switch, you need to control lighting from multiple locations, typically involving two 3-way switches and one 4-way switch. The 4-way switch has four terminals: two common and two traveler terminals, arranged in a “T” shape.
Safety First: Always turn off the power at the circuit breaker and use a voltage tester to ensure no live voltage is present.
Wire Types and Colors: Use 14-gauge wire for standard residential 15-amp circuits. Wire colors indicate their function: black and red for “hot” wires, white for neutral, and green for grounding.
Line and Load Sides: The line side is where the power enters, and the load side connects to the light fixture. Ensure correct identification to avoid circuit issues.
Traveler Wires: These connect the switches, allowing them to switch paths. In a 4-way setup, traveler wires pass through the 4-way switch, which acts as an intermediary.
Grounding: Maintain the grounding system for safety by connecting all green wires appropriately.
Local Codes: Consult local electrical codes or online resources to ensure compliance.
Testing: After wiring, test each switch individually to ensure proper function and safety.
By following these steps methodically, you can safely and effectively wire a 4-way switch setup.
10.3 Manufacturer Guides
Manufacturer guides provide detailed instructions and diagrams for wiring 4-way switches, ensuring compatibility with specific products. Brands like Leviton and Lutron offer comprehensive resources, including wiring diagrams and troubleshooting tips; These guides are tailored to their devices, ensuring safe and efficient installation. They often include step-by-step instructions, safety precautions, and compliance with local electrical codes. PDF versions are readily available for download, offering clear visuals and easy reference. Manufacturer guides are invaluable for both professionals and DIYers, guaranteeing proper setup and functionality of 4-way switch systems.
Best Practices
Always follow manufacturer guides, adhere to local electrical codes, and use proper wire coloring. Regular maintenance ensures long-term functionality and safety in 4-way switch installations.
11.1 Following Local Codes
Always adhere to local electrical codes and regulations when installing 4-way switches. These codes ensure safety, proper connections, and compliance with regional standards. Use approved materials, such as copper conductors, and follow guidelines for wire sizing and insulation. Consult local authorities or certified electricians if unsure. Compliance prevents hazards, legal issues, and ensures reliable performance. Manufacturer guides, like Leviton’s, often align with these codes, providing additional support. Prioritize safety and legal requirements to avoid penalties and guarantee a professional-grade installation. Proper adherence enhances system longevity and functionality, making it a critical step in any wiring project.
11.2 Proper Wire Coloring
Proper wire coloring is essential for safe and efficient electrical connections. Black wires represent hot conductors, white for neutral, and green for ground. Red often signifies a secondary hot wire; Using standardized colors ensures clarity and prevents accidental short circuits. Always follow local codes and manufacturer guidelines, such as those in Leviton diagrams, to maintain consistency. Incorrect wire coloring can lead to dangerous electrical issues or malfunctions. Proper identification streamlines troubleshooting and enhances safety. Always double-check wire colors before making connections to ensure compliance with industry standards and avoid potential hazards.
11.3 Maintenance Tips
Regular maintenance ensures the longevity and reliability of your 4-way switch system. Inspect wires for damage or wear, and tighten connections periodically. Clean switches with a damp cloth to prevent dust buildup. Avoid harsh chemicals, as they may damage components. Test switches to ensure proper functionality and replace any faulty units promptly. Refer to manufacturer guides for specific care instructions. Proper maintenance prevents electrical hazards and ensures smooth operation. By following these tips, you can maintain your wiring system’s efficiency and safety over time.